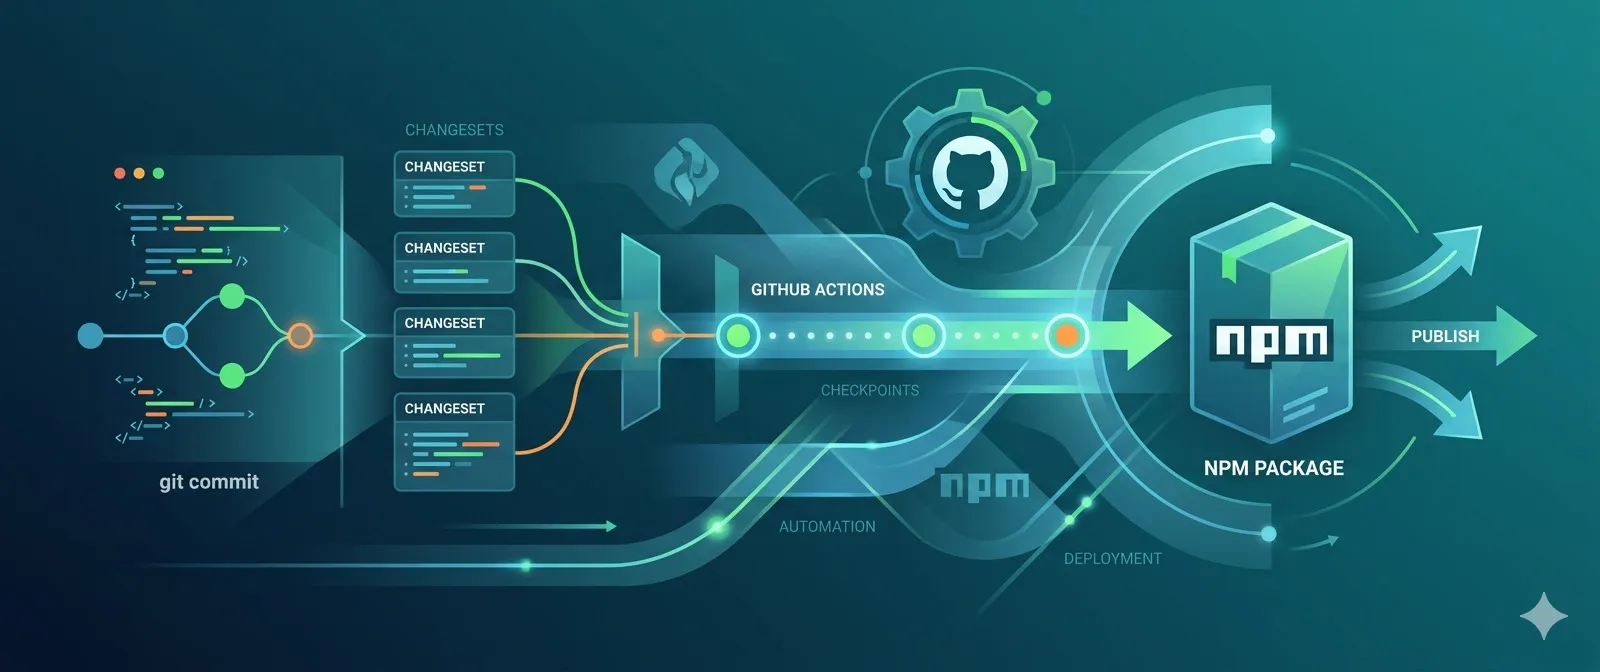
This article is a follow-up to my previous article, “Getting started with Changesets”. If you haven’t read it yet, I highly recommend doing so first, as it will give you a better understanding of what Changesets are and how they work. In this article, I’ll show you how to publish your npm package using Changesets and GitHub actions — this way, you don’t have to worry about manually running the publish command and can focus on writing code and creating new features instead. Keep in mind that you must have initialized your repository with Changesets, so make sure you have already set it up (more details in the “Getting started with Changesets” article) before proceeding with this one.
For the record, at the end of 2025, and after many security issues on the npm registry, the npm team decided to revoke all personal npm tokens to increase security. This, of course, led to many broken pipelines, especially those used for publishing npm packages. This affected my own npm packages, and that’s the reason I wrote this guide. In this guide, I’ll show you how to automate the publishing of your npm packages using GitHub actions! Let’s get started!
Configuring trusted publishing on GitHub actions
Before starting, please make sure you read and understand the “Trusted publishing for npm packages” and the “Npm classic tokens revoked, session-based auth and CLI token management now available” documentation from the NPM and GitHub sites. Now, let’s start with the configuration:
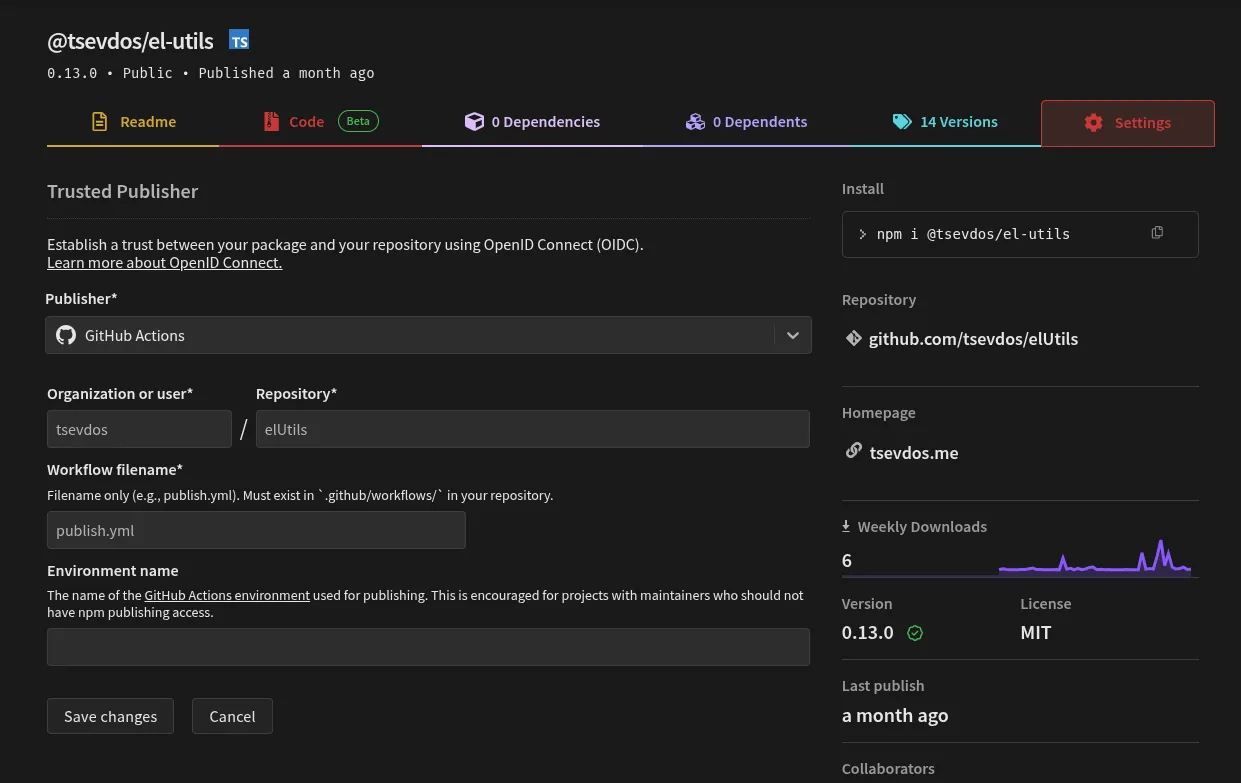
The first step is to configure trusted publishing on Github actions (or GitLab CI/CD Pipelines). Visit your npm package page at the npm registry, and click on the “Settings” tab. Then click on “Add a trusted publisher”, GitHub Actions in our case, and fill in the following fields:
- Organization or user (required): Your GitHub username or organization name
- Repository (required): Your repository name
- Workflow filename (required): The filename of your workflow (e.g.,
publish.yml)- Enter only the filename, not the full path
- Must include the
.ymlor.yamlextension - The workflow file must exist in
.github/workflows/in your repository
- Environment name (optional): If using GitHub environments for deployment protection
Check out my settings:
Create the GitHub workflow
Once you complete the above configuration, you can create a file at .github/workflows/publish.yml with the following content.
name: Publish

on:
  push:
    branches:
      - main

concurrency: ${{ github.workflow }}-${{ github.ref }}

permissions:
  contents: write
  pull-requests: write
  id-token: write

jobs:
  publish:
    name: Release
    runs-on: ubuntu-latest
    steps:
      - name: Checkout Repo
        uses: actions/checkout@v6

      - name: Setup Node.js 24
        uses: actions/setup-node@v6
        with:
          node-version: 24
          registry-url: "https://registry.npmjs.org"

      - name: Install Dependencies
        run: npm i

      - name: Create Release Pull Request or Publish to npm
        id: changesets
        uses: changesets/action@v1
        with:
          # This expects you to have a script called release which does a build for your packages and calls changeset publish
          publish: npm run release
        env:
          GITHUB_TOKEN: ${{ secrets.GITHUB_TOKEN }}
          NPM_TOKEN: "" # https://github.com/changesets/changesets/issues/1152#issuecomment-3190884868
          NPM_CONFIG_PROVENANCE: true
For some reason, the Changesets action requires the NPM_TOKEN environment variable to be set, even if it’s not used (see the Github issue #1152)! Feel free to modify the above workflow to fit your needs. If you need any inspiration, have a look at my workflow.
Now whenever you push to main, Changesets will open a new pull request with the changeset, and once you merge that pull request, the package will be automatically published to npm registry! You can also modify the workflow to publish directly to npm without creating a pull request, but I prefer this approach because it gives us more control over what gets published. You can view an example PR opened from Changesets here. When you merge the PR, the package will be published to npm registry!
Install the Changeset-bot on your Github repository
As a bonus / optional but very convenient step, is to install the Changeset bot from the Github marketplace. This bot will automatically prompt any contributor (even yourself) to create changesets without having to run the npx changeset command locally, letting you do it directly from the GitHub site instead.
That’s all! You can finally focus on writing code and creating new features for your package, and let the workflow take care of the publishing process. I hope you found this guide useful and that it will help you automate the publishing of your npm packages using Changesets and GitHub Actions. If you have any questions or suggestions, feel free to leave a comment below or reach out to me on Twitter @tsevdos. Happy coding!